The integration design and Unicrow’s user experience is intuitive enough for a reasonably experienced web3 user to skip this guide completely. However we encourage those not familiar with the basic concepts and tools to continue reading and we welcome them to the magical world of web3.
Basic concepts
Web3 wallet
Typically a browser extension that can interact with smart contracts and that manages keys for your crypto balance (e.g. ETH and stablecoins). The most popular web3 wallet is MetaMask.
Ethereum gas fees
It is necessary to pay a fee for every transaction on Ethereum or one of its Layer-2 networks. This fee goes to securing the network. It is paid in the Ethereum’s native currency Ether (ETH, often referred to simply as Ethereum).
Unicrow payments cost typically < $0.50 in ETH.
Arbitrum One (Ethereum Layer-2)
Since transactions with smart contracts on Ethereum’s main network (called mainnet) can get expensive, many users and protocols rely on layer-2 networks. Unicrow is currently deployed on the largest of the L2 networks called Arbitrum One.
Many of the largest exchanges including Binance, Coinbase, or Crypto.com now support Arbitrum One natively, i.e. you can withdraw and deposit funds directly to and from the network without ever having to interact with Ethereum mainnet. Go to https://portal.arbitrum.io/?categories=centralized-exchanges to see the latest list.
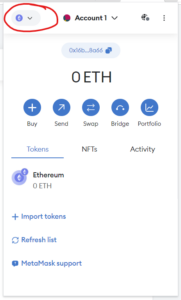
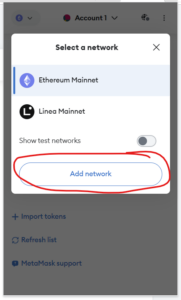
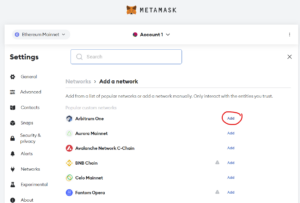
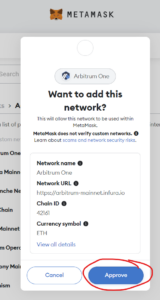
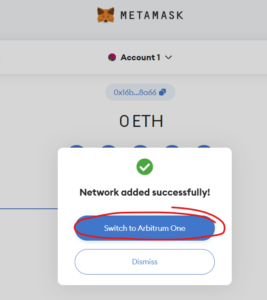
Your web3 wallet will almost certainly support Arbitrum natively, even though you might need to add it to the list of default networks. See screenshot how it’s done in MetaMask.
Step-by-step Guide
Pre-requisites
– Installed web3 wallet with Arbitrum One configured.
– Small amount ($1) of ETH on Arbitrum One network to pay for gas fees
– USDT balance needed for the domain purchase on Arbitrum One
Steps
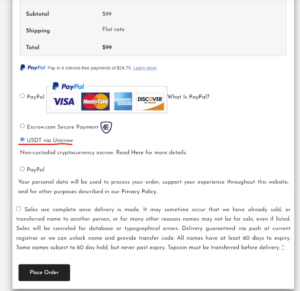
1. Checkout with Unicrow
Once you add the domain you want to buy to the cart, proceed to checkout. There, select Unicrow as a payment method and press Place order
2. Payment
You’ll be taken to Unicrow’s app where you you’ll need to go through a few steps, depending on the status of your wallet’s connection to the app and to the network.
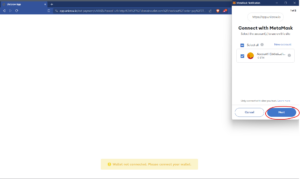
2.1 Connect Wallet
If this is your first time using Unicrow, you’ll need to connect your wallet.
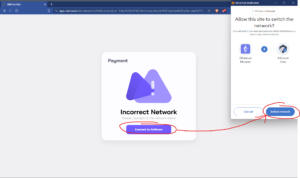
2.2 Connect to Arbitrum
If you are not connected to Arbitrum, the app will ask you to do so at this point
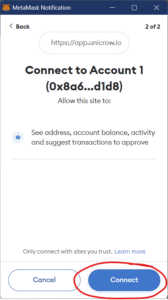
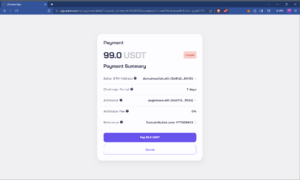
2.3 Review Details
You can review all the payment details before sending the payment to the wallet for signing
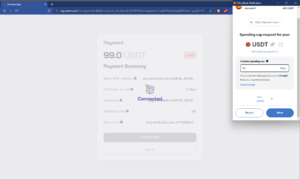
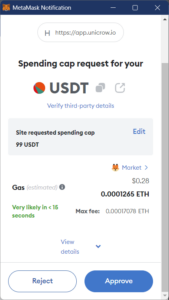
2.3 Set a spending cap
In order for Unicrow smart contracts to receive USDT from you, you need to give them permission to “spend” them from your wallet. By default, only the amount necessary for this transaction will be filled in.
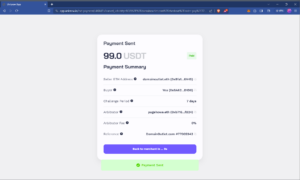
2.4 Confirm the payment
Finally, you can send the payment. Unfortunately because of how web3 wallets and contract interactions work, you can’t see how much are you sending here. However, since you’ve approved only the amount needed for this payment, you have a guarantee that only that amount can be withdrawn.

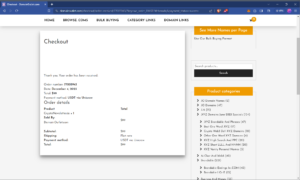
3 Payment Complete
When you complete the payment, you’ll see the confirmation in the Unicrow app. You will be automatically brought back to DomainOutlet to see the order receipt